
Learn how to restore a Jenny Lind spindle bed without painting it, giving it a second life and creating an heirloom piece of furniture.

As much as I can help it, I try not to buy brand new furniture, at least when it comes to things like bed frames, dressers, side tables, that kind of thing. I came to a point where I was sick of buying laminate furniture that wasn’t hardy and didn’t stand the test of time. That’s why when it came to beds for my children, I wanted to find something that was well made and solid wood.
I had a vision for a set of beautiful matching Jenny Lind style spindle beds, but never could find what I was looking for. For years I scoured the thrift stores and Facebook Marketplace trying to find a beautiful matching set, and it was finally fate when I stumbled upon two Jenny Lind style beds earlier this year.


While beautiful, these beds were clearly someone’s project pieces and were in desperate need of some serious restoration. The original stain and varnish were deteriorating, there were lots of scratches and cracks and they just needed a complete makeover. I knew this project was going to be a huge undertaking, and let me tell you, it did not disappoint.
WARNING!
If you are someone who quits easily, has carpel tunnel or just generally hates hand sanding and getting dirty, DO NOT ATTEMPT THIS TYPE OF PROJECT! Okay, I’m slightly kidding, but seriously think twice before you dive in because let me tell ya, it’s a lot of work … but it’s sooo worth it in the end if you stick to it; I promise.
PIN FOR LATER!

YouTube Video
This post may contain affiliate links, which means I may receive a commission, at no extra cost to you, if you make a purchase through a link. Please see our full disclosure here for further information.
Products Mentioned
Products Used for this Project
Here you'll find all the products I used in this Jenny Lind Style Bed Makeover!

Orbital Sander
BLACK+DECKER Orbital Sander, 5 Inch, 2.0 Amp, 12000 OPM, Corded, 1 Sandpaper Sheet and Dust Bag Included (BDERO100)

Mixed Grit Sanding Pads
52 Pack 5 Inch 8-Hole Hook and Loop Sanding Discs Sandpaper Red Round 60 80 120 220 320 Mixed Grits Sandpaper for Random Orbital Sander

Amazon Basics Heavy Duty Oven Cleaner, Lemon Scented, 16 oz, Pack of 1
Amazon Basics Heavy Duty Oven Cleaner, Lemon Scented, 16 oz, Pack of 1

Wire Brush
3pcs Wire Brushes for Cleaning Rust, Upgrade Wire Brush Set - Brass/Stainless Steel/Nylon Bristles, Small Metal Wire Brush with Curved Handle Grip, Wire Brushes for Paint and Stain, 7 Inches (3pcs)

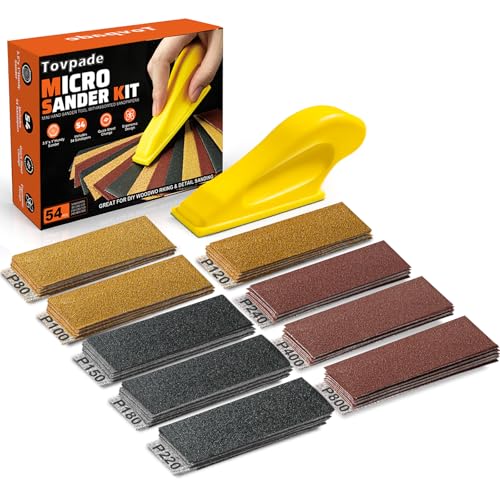
Micro Sander
TOVPADE 54PCS Premium Micro Sander, Detail & Mini Sander Block – Precision Small Hand Sanding Tool, 80–800 Grit Sandpaper Kit, 3-in-1 Set for Wood, Crafts, Furniture, Tight Spaces & DIY Projects


Varathane Early American Penetrating Stain
Varathane Premium Fast Dry Wood Stain | 1 Hour Dry Time | 1 Coat Color | Interior Wood Stain | Furniture, Cabinets, Doors, Trim | Half Pint | Early American


Varathane Water-Based Polyurethane Satin
Varathane Water-Based Crystal-Clear Ultimate Polyurethane | Interior Wood Protection | Fast Dry Time | Easy Clean Up | Satin | Half Pint

Rust-Oleum Clean Metal Primer
Rust-Oleum 7780830 Stops Rust Clean Metal Primer Spray, 12 oz, Flat White

Rust-Oleum Satin Heirloom White
Rust-Oleum 334071 Painter's Touch 2X Ultra Cover Spray Paint, 12 oz, Satin Heirloom White

Rust-Oleum Semi-Gloss Clear
Rust-Oleum 249859 Painter's Touch 2X Ultra Cover Spray Paint, 12 oz, Semi-Gloss Clear
How to Restore a Jenny Lind Style Spindle Bed Without Painting
Step 1: Sanding the Flat Surfaces
I started off this project by using my orbital hand sander and 60 grit sand paper to sand off as much of the old varnish as I could, particularly on the flat parts of the head and foot boards. This turned out to work really well and I was able to hit bare wood in those areas pretty quickly.

Step 2: Stripping Off the Old Varnish
There are a few products that people like to use for stripping paint and varnish from wooden pieces. These are products like Citrus Strip and Kleen Strip. I’ve tried several times to use these products on stained wood and they never work well, and that’s exactly what happened on this project. I did one round with the Kleen Strip and it really just made more of a mess than anything.

So I went with my tried and true method of varnish stripping and that’s good ‘ol oven cleaner. I like to use the Great Value Oven Cleaner for this because it’s somewhat inexpensive and works like a charm. All I did was spray all the stained surfaces, particularly the spindles, with a good coat of oven cleaner, then I covered it all in plastic wrap and let the oven cleaner work its magic for 30-60 minutes. After that, I used a wire brush and some steel wool to scrub off as much varnish as I could from the spindles and other areas I couldn’t reach with the orbital sander. For some of the pieces I had to do two rounds of stripping before I was ready to move to the next step.


I sprayed the pieces down really well with water and then let them dry completely, for at least 24 hours before I started sanding. This step is crucial because you can damage the wood if you try to sand when they’re wet. Trust me.


Step 3: Hand Sanding the Spindles
Now this is the part that is the most time consuming. It took me over 18 hours to sand these beds, mostly by hand. After the first four hours of hand sanding, I decided I wanted to aim for good enough, as opposed to perfection. To make the spindle sanding more manageable, I used a carbide scraper to remove as much of the stubborn varnish as I could first. This proved to be a much faster method than relying solely on sanding and was so satisfying.

Once I had scraped as much as I could, I used a small hand sander to sand off the rest. I started with 60 grit sand paper, then went over everything again with 120 grit to smooth it all out. Typically for projects like this, I like to sand to 220 grit before stain, but I needed to simplify the process and 120 grit was a smooth enough finish for me.

I did go back in and finished off the flat areas with 220 grit sandpaper because it was a lot easier.
Step 4: Repairing Cracks in the Wood
As I said, there were a lot of cracks in the wood that needed to be addressed after sanding. I couldn’t find a wood filler that matched my stain combo well and to be honest, I’ve had trouble in the past getting wood filler to look natural stained, so I turned to an alternative way of filling cracks and holes.
Really simply, I used sawdust that my orbital sander collected while I sanded and some wood glue. I just stuffed the hole or crack with some sawdust, followed by a line of glue that I smoothed out with my finger, then topped it off with more saw dust.


Once the crack was filled, I found it really important to remove excess glue from the surrounding wood with my carbide scraper and some sand paper. This helped to really hide those areas I filled.


Step 5: Staining and Sealing the Beds
Now was the part I had been looking forward to the most, stain. I wanted to follow all the rules and steps as best I could, so the first step was applying a wood conditioner. I used Varathane’s wood conditioner. This just helped prevent blotchiness and ensures a more even stain application.


Once the conditioner had sat for the appropriate amount of time, I went in with Varathane’s oil based penetrating stain in the color Early American. I thought it looked absolutely stunning, but after it dried down a bit, I felt I needed to add something else to really enhance the look. Over top the penetrating stain, I applied a Varathane gel stain in the color Hickory. The difference was huge and I loved the look so much more.


This was the moment the entire project finally felt worth it.
To top it all off, I allowed the stain to dry for over 72 hours before applying 3 coats of a water-based polyurethane. This gave it a super durable finish, which will be much needed since these are for my kiddos. I made sure to lightly sand with 220 grit sand paper in between the 2nd and 3rd coats so I got a really smooth finish.


Step 6: Addressing the Side Rails
The side rails were a little rusty and needed an upgrade. I first primed them with Rustoleum’s Clean Metal Primer to help prevent the spread of any rust.

Then I painted them in a couple coats of Rustoleum’s Heirloom White spray paint in a satin finish.

I finished them off with some sealer and they were ready to go.

Step 7: Adding Slats
I was able to re-use slats from another bed I had, but I had to get 12 more for the second bed. I had someone at Home Depot cut 12 slats from 1 x 4s into 38.5″ pieces.

The boards were pretty rough, so I quickly sanded them all so they didn’t snag the mattresses and they were good to go.

Final Thoughts
I’m so happy I stuck with this process. I almost quit so many times and just painted these beds, but I’m so glad that I was able to restore them back to their former glory and give my kids a piece of heirloom furniture they can take with them some day.

These beds are so beautiful and sturdy. I know they’ll stand the test of time because I stuck with the process. If you choose to take on a similar project, I urge you to give yourself plenty of time and see it through. You won’t regret it!
ARE YOU LOOKING FOR OTHER FURNITURE MAKEOVER IDEAS?
Looking for more furniture makeover ideas? Check these out!


Leave a Reply